|
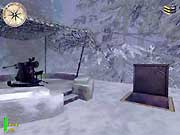
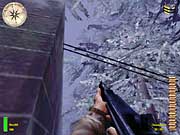
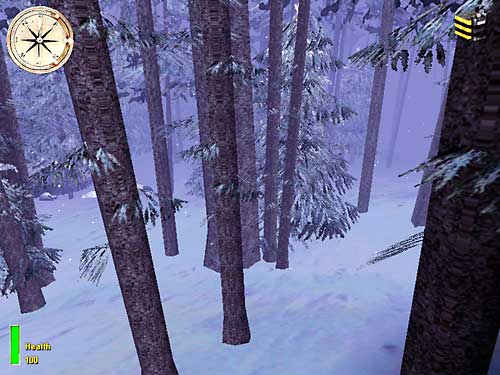
| Pic. 1 - The enemy Guard 1 can be easily killed from K1. He won't even notice your presence. |
The Siegfried Forest - Bunker Hill - MoHAA
Introduction
You're at the second part of The Siegfried Forest level, the Bunker Hill part, from "The Return to Schmerzen" mission. Again, you have two objectives, very similar to the ones from the first part:
There are 21 enemies scattered around the snowy forested area. This second part is smaller than the first one and, as you can see, with less enemies. Once again, you need to be patient and careful. The enemies are hard to see and they'll probably see you before you see them, if you act carelessly. Watch your compass and quicksave often. You can get lost easily in the forest. But again, if you know the right path, you can avoid most of the enemies and head directly towards the objective point and to the exit, passing through the map killing just 5 enemies, as you'll see.
|
Getting To Know The Enemies |
These are the enemies guarding this part of the forest:
Note that the positions of some enemies are not fixed. Some of them get out of their original position when they notice your presence.
|
The Safe Route & The Minimal Killing |
The safest path to get through this map is a lot easier to explain than the one from the first part. You still need to use the compass very carefully, paying close attention to the points where we have a change of direction. And whenever near the enemies, don't run, walk.
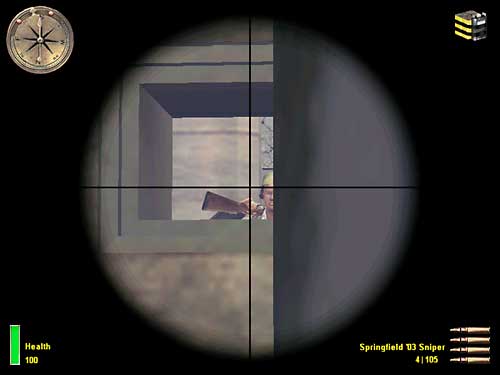
The first killing (K1) - From the point you start the level, head North just enough to approach a corner that opens the forest to the right. From this corner, the K1 spot on the map, you can see Guard 1 and, if you're at the right position, he won't be aware of your presence. Using the Springfield and the scope, you can kill him easily (pic. 1, with the corresponding scope view inset at the upper right corner).
|
| Pic. 1 - The enemy Guard 1 can be easily killed from K1. He won't even notice your presence. |
Route to K2 - Now walk towards South direction. After a while, you'll be beside the main bunker. Turn left and soon you'll see its entrance door. Take care because there is one enemy guarding this entrance (pic. 2).
 |
| Pic. 2 - If you take extreme care, you can kill the enemy at the entrance before he even moves. |
Invading the bunker - Now, from K2, you must invade this main bunker. There are four enemies to kill, or three, if you've already managed to kill the one at the entrance (pic. 2). It's easy to kill them all. After killing them, climb up the stairs inside the bunker to get atop of it (pic. 3).
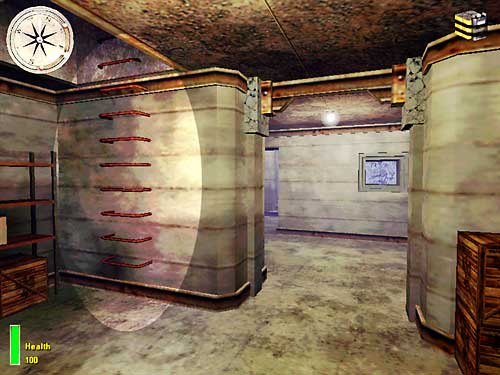 |
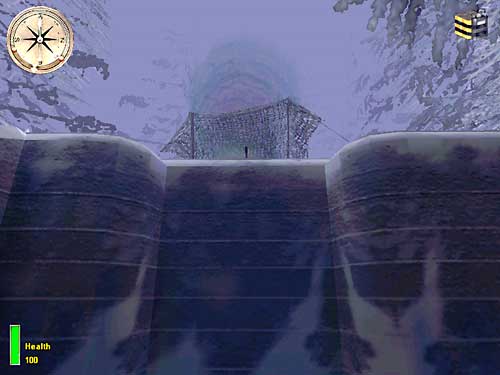
| Pic. 3 - After cleaning the bunker atop the hill, you must climb that ladder to get atop of it. |
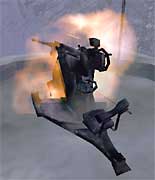
At the top of the main bunker, you can see the 20mm Flak (small pic. 4). Set the charge and run to the stairs to climb it down and to take cover from the strong explosion (small pic. 5).
|
|
Now, get out of the bunker and, as soon as you pass through its exit door, take right.
Curiosity: if you go around the main bunker, you can see a couple of wires exiting from one of its outside walls, near a corner (see small pic 6, beside). If you follow these wires, it'll lead you to Bunker 1. I believe it was supposed to be an alarm wire (I don't understand german but I also believe I can hear some germans shouting "Alarm..." when I invade the main bunker) but the fact is that there is no alarm in this sub-mission. So, what is it for?
|
Exiting the forest - Next, you must align properly to proceed. You're going to use a route that will avoid you from facing Guard 2 (to your right) and the enemies at the two Tents (to your left). If everything goes right, you won't need a weapon anymore so, holster yours. Then, walk around the main bunker until you can see the blown Flak atop of it. Stop and, facing exactly West, align yourself to the middle of the canon (pic. 7).
 |
| Pic. 7 - You must align yourself with the cannon, while looking exactly towards West. |
After you get the alignment, using only the mouse, turn around and face exactly East. Now, forget the mouse and use only the keyboard to move because you're going to walk all the way to the East. Start walking East and, if needed, use strafe key to get through any obstacle (like a tree or a stone).
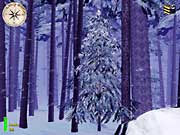
 You're going to pass between some trees (small pics 8 & 9 beside) ...
|
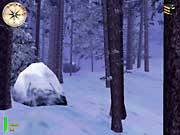
 ... and near some stones (small pic 10, at far left), until you reach the end of the map (small pic. 11 beside). Then, stop.
 |
Now, take left and walk always near the edge of the map. Soon you'll have to take right (look at the schematic map, down below). Keep walking very near to the edge until the next corner. Do not go any further! If you go ahead this next corner, the enemies at bunker 2 will start firing at you, from the right. You must, at this corner, look towards Northeast (pic. 12).
 |
| Pic. 12 - The Northeastern view. Deviate from the trees and stones always by strafing right. |
Start walking towards NE (use only the keyboard, put aside the mouse). You'll have to use the strafe key to pass through some trees and stones in your way. Always strafe to the right and just enough to deviate the obstacle, to be able to keep walking NE. Using this path, you will avoid the enemies at Tent 2 and the enemies at Bunker 2.
Once you reach the next edge of the map, turn right and keep following the edge of the map all the way until you reach the exit of the level. That's all it takes.
Extra killing - If you're not feeling good for killing just five enemies out of 21, I'd advice you to kill them all. Now that you already know their location, it's not that hard to get near them, preferably by their back, and kill them all. Remember that once you kill the first one of a group, all the others will immediately notice you and start shooting at you.
|
The Schematic Map |
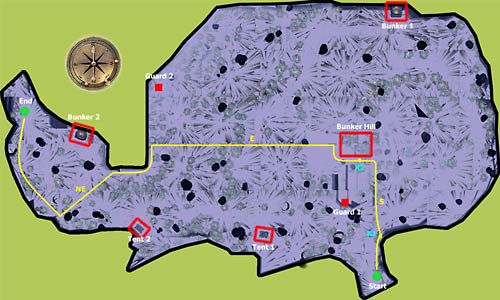 |
| Main Picture - A schematic map showing all the enemies and the bunker hill, where the 20mm Flak is located. Follow the yellow path. Click the image to open a bigger picture. |
Obs.: The schematic map is based on cheated screenshots. All others are real screenshots or cut from real ones.
|
Hope It Helped !! |
http://www.viol.net/mohaa
Version 1.00 posted on Apr 6th, 2002.
All rights reserved. © 2002 by André Viol.