The Command Post - Part II - MoHAA
Invading The Manor
Introduction
You're at mission four, "Behind Enemy Lines", third sub-mission: The Command Post. Hard difficulty setting.
This walkthrough is divided into three parts. Click the one you want to read but consider that a given part only applies as a sequel of the preceding one since they are interconnected:
- Part I - Killing the enemies in the outside areas.
- Part II - Killing the enemies inside the houses (this page).
- Part III - Escaping and meeting up with Manon.
If you want to access the aerial view map of The Command Post, please, go back to Part I and click the Main Picture, at the bottom of the page, or choose the small version of it using the appropriate link.
The outside area is clean, but not safe. If you try to walk where E28-E29 were located, no matter how careful you may be, the alarm should, most likely, go on. If you try to walk near the houses carelessly, running, for instance, the alarm will go on, because the enemies inside hear your footsteps and it seems that killing the outsiders increases a lot the sensibility of the insiders. So, take extreme care.
Now, you're going to face the worst part of this level (in terms of difficulty), when you have to deal with that annoying alarm and the spawned enemies, those endless enemies. Read again the topic about them in Part I if you need to refresh your memory. I found no way to enter the second and third houses without, sooner or later, having the alarm toggled on by the enemies inside.
To invade the houses, you're going to need a lot of patience, in spite of all the action you'll be going through. There are around 40 fixed enemies inside the three houses: 6 inside the first house and around 18 inside the second one and 15 inside the third one. Many of them can turn the alarm on and alarm on means endless spawned enemies. So, what you really need to do is to kill the fixed enemies because only by killing them you can really clean the houses. The spawned enemies are just a side effect. So, have in mind that our goal is to kill the fixed enemies. You can kill one thousand spawned enemies and you'll get no results but if you'd kill only the 40 fixed ones (if that was possible), the houses would be clean. The fixed enemies wear different clothes than the spawned enemies: learn to recognize them, just to be happier when you kill a fixed one. From now on, I'll be calling the first house as H1, the second one as H2 and the third one as H3.
Before starting the invasion, we need to learn a very useful technique, the one that's going to save your day. I named it as "Let it ring" technique. What is this? I've noticed that turning off the alarm most of times is useless because the enemies turn it on again. If you turn it off, they turn it on again, even if you stay put, not running, near an alarm switch. And this sequence of turning it on & off gets really annoying because it brings no results. But also, I've notice that there is a trick! If you DO NOT turn it off and let the alarm ring away, when you turn it off, after a while, the enemies won't, most likely, turn it on again, until the next time you trigger them to do it. It seems that letting the alarm ring away is not annoying only for us but also for them. Funny, isn't it?
And how to use this weakness of the enemy against themselves? Easy, let the alarm ring while you're in a vantage position, where you can kill some fixed enemies and have plenty of ammo and health around, taken from the coming flow of spawned enemies. Do you remember what I've said about your goal being to kill the fixed enemies? But, to kill some fixed enemies, you have to face a bunch of spawned ones, so the better option is to face them in a vantage position, near a corner or a door where you can take cover, kill the spawned ones safely, and also get their health canteens and their ammunition, while waiting for some uncautious fixed enemy to show up or while trying to kill the fixed ones by moving yourself rather around, but always covered, using your vantage location as a safe base of killing. During this time, you should quicksave whenever you're in a good situation, i.e., when you have plenty of ammo and plenty of health; it's very important to quicksave often so if anything goes wrong just quickload you last good situation.
While shooting at the enemies that show up, although you have plenty of ammo around (from the dead spawned enemies), a good way to save some bullets and save some reloads (and save risky reloading time) and have a better aiming is to shoot selectively, i.e., don't keep firing as a mad guy, but instead fire some shots, two to four at a time, and the enemy will temporarily lose its sense (like when you are hit!) and then, you can kill him easily, using some more shots in his head. By the way, this tip is okay not only here, but throughout the whole game. It doesn't apply when you have to face more than one enemy at the same time.
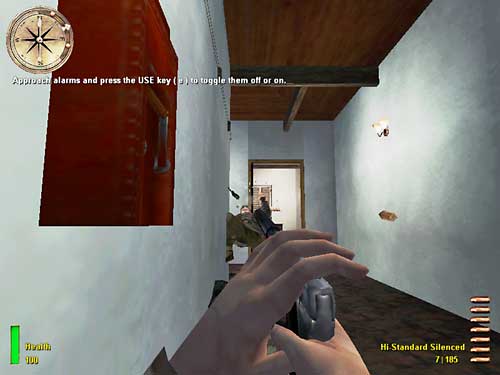
And how long should I let the alarm ring? My experience shows that you must let it ring at least until you have received five messages to turn the alarm off, like this one: "Approach alarms and press the USE key (e) to toggle them off or on". After five of theses messages, if you manage to turn the alarm off, most probably it won't be turned on again by the enemies until the next triggering.
Note that we're going to use the "let it ring" technique in two different situations:
- first, to be able to kill the fixed enemies, our main goal;
- but also to be able to just toggle the alarm off definitely (until the next triggering, of course) in case I need to toggle it off but the enemies keep turning it on.
If you're that kind of courageous guy that likes to face the danger as it's meant to be, the second function of "let it ring" technique can be replaced by the old run & gun approach, so, if you read me telling you to use the technique just to shut an alarm off, you can also try to find a quicker, but probably tougher, way to do the same step but using run and gun.
|
Start By The Second House |
|
We're going to start it by invading H2. Although invading H1 is a lot easier, if we try to invade it first, chances are that the alarm will go on, because the enemies at the other houses can hear the action, even using the pistol, and can turn the alarm on. Sometimes, it is indeed possible to invade H1 first without having the alarm set on at all, but this situation doesn't always happen due to the random group behavior factor I told about before (see Important Observation, at the beginning of this walkthrough), so, let's leave H1 as the last house to enter. With one known exception, discussed later, enemies inside H1 seems not to care about the action inside the other houses.
Note: you can try to invade H1 first, by following the instructions detailed in the topic "Finally The First House", down below. If you manage to invade it without having the alarm toggled on, just proceed with H2 and then H3. Actually, many times you'll be able to manage this. Sometimes, you won't.
First, for the sake of easy identification, let's name the entrance doors to H2 since it has three of them: two in front of it, one at the back. I'll call the front door facing the wall of H3 (where E28 and E29 were guarding) as the sidedoor; the other front door, not facing that wall, as the frontdoor; the last one, behind the house, as the backdoor. You're going to invade H2 using its backdoor, near the guard house (E21) because the area near the front doors are extremely dangerous.
 So, the first thing to do is to get near H2 backdoor (small pic 1 beside). It's not easy as it looks like. Enemies inside the houses seem to be all ears. From K27, start going around the houses counterclockwise, near the edges of Area "C" (walls and fences) and don't run, always walk. When near the backdoor, head closer to it very very quietly, even crouched to walk slower. Walk a little, stop, wait around ten seconds to be sure that no enemy noticed you (you hear first a door opening and then the alarm goes on, in case they notice you) and then quicksave. Keep doing this "walk-wait-n-quicksave" approach until you're in front of the door (S2 on the map; see small pic at the left). If the alarm goes on, quickload and keep trying. You don't have to get too close, though. Once in front of the backdoor select the MP40, reload and quicksave.
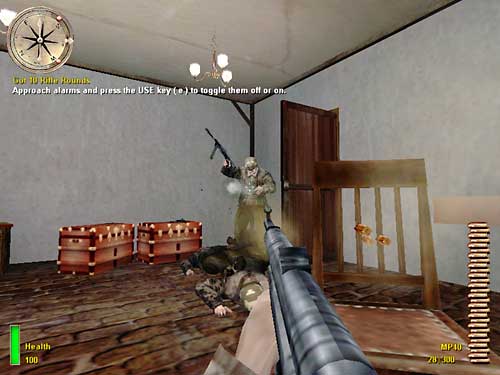
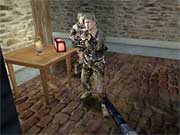
Start running, open the backdoor and enter the first door of the corridor, to your right, very near the backdoor. Kill two guys inside this room, crouch and stay near the table, looking to the door, waiting for the enemies. The alarm is on. Now, it's time to debut the let it ring technique.
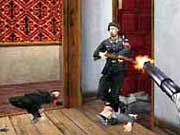
Crouched, keep looking at the door and kill every enemy that try to enter the room. By picking the weapons left by the dead spawned enemies, you can have an endless supply of ammo and by picking the health canteens, you can heal yourself to 100% if eventually you are or have been hit (I have already healed myself from 1% to 100% just by picking up the health canteens). Don't panic. Take your time (pic. 2). Remember that if you're not killing the spawned enemies, no new one is being created and that there will never be more than two of them around at the same time. Don't let the alarm bother you, think of it as beautiful music to the ears. You'll see that it's easy to kill them because you're in a vantage position. They will open the door to try to enter the room and this alerts you. When they enter, normally one by one, just kill them. While killing them, whenever you're in a good health and ammo situation, quicksave. And keep killing. Be happy when you kill a fixed enemy because they are your goal, but they are smart, they don't show up easily, sometimes. You have to hunt them.
| Pic. 2 - Kill every enemy that tries to enter the room. Don't mind the alarm. Grab all the ammo and health canteens you need and be happy when you kill a fixed enemy. That's let it ring technique. |
From inside the room, normally you should be able to kill one to three fixed enemies that will try to enter it. If you hear grenades, don't worry, they won't affect you here. When you notice that only spawned enemies show up, you're full of health and full of MP40 ammo, time to get out. If no one is entering, also it's time to make them show up. Go to the corner near the door and open the door carefully. As soon as the door opens, you'll see another door ahead, the second door of this corridor, to the left side now (small pic. 3 beside). Kill any enemy there or coming to get you (some fixed enemies may be there). Then, when the corridor is temporarily clean, get out of this room, but head back to the alarm switch outside and run backwards. Keep looking ahead, and running backwards, shoot any enemy that shows up in the corridor and go back to the alarm outside to turn it off. |
| |
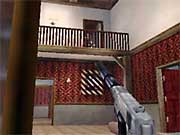
Immediately, enter the house again, kill any enemy coming and head now to the door at the left (the one you saw when trying to get out of the first room). Kill any enemy on your way. Enter this room, the library, but with care. Look up and there may be a fixed enemy in the first floor: Kill him. At the library, there may be one or two fixed enemies also. One should be to your left (small pic. 4 beside). Kill them all. You must not go further inside the library or the alarm will be turned on again. Stop at the fireplace corner, near the alarm. The alarm should be off yet. Stay put and stay calm. If you stay near this area, the alarm should not go on again! |
| |
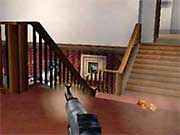
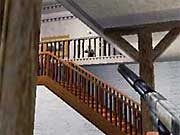 Now, you must kill one or two enemies on the first floor, normally to the right side of the stairs. Look to this side and strafe carefully to the left, always looking up, until you see the enemies. Kill them using the pistol. They are agile so be careful. You may want to take cover using the wooden pillar, not the one just ahead of you but the one more at your left (small pic. 5 beside). And very important: DO NOT go ahead too much or you'll trigger some enemies from the first floor to run to an alarm; normally this alarm is the one from the first floor, what is bad, because you are at floor level; sometimes, the enemies run downstairs to try to activate the outside alarm switch, what is good because they'll pass right in front of you and you can kill them easily. The invisible line that that you shouldn't cross yet or you trigger that behaviour is aligned with the end of the upper balcony, so keep an eye up.
 |
Now, head back to the corner near the alarm switch and be prepared to go upstairs. Select the Thompson (the pistol also works fine) and run. Climb up, turn right and head to the double door. Open it sort of carefully and kill the guys inside quickly (some of them will be near the alarm switch, straight ahead). Go to the alarm switch and turn it off. Always quickly, look back to the double door and wait for the two spawned enemies to show up. Kill them.
Then, climb the stairs to the second floor but carefully. Two enemies should start climbing it down and you'll face them. Kill them. A third one stays up there. Kill him. "Steal the German battle plans". Objective completed (Battles unplanned auto-save title). Go down back to the first floor. If eventually the alarm goes on again (a rare and bad situation), some enemy should be using the alarm switch at the guard house, in front of the house. You must go there and kill him and any spawned enemy on your way and then come back. Or you may prefer to use the let it ring technique, staying near the alarm switch of the first floor, just enough to be able to turn off the alarm, by waiting the five turn-alarm-off messages (pic. 6).
| Pic. 6 - If situation get out of control, use let it ring technique to shut the alarm off again. |
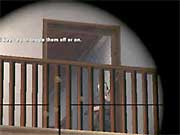
 Exit the room through the double door and take the corridor to the right, still on the first floor. Now you have a decision. You must kill the guys inside these two rooms ONLY if you can do it without having the alarm turned on again. So, quicksave and open the first door and kill the two guys inside using the pistol (small pic. 7 beside). Wait to see if the alarm is toggled on. If so, try again some more times but if you notice that there is no way to kill them without having the alarm set on, forget it for now. You're going to kill them later. Do the same for the second room (in case you were able to kill the enemies in the first room without having the alarm toggled on). At the second room, you'll find explosives. Acquire them! You need them to earn the medal, later. If you didn't kill the guys, you're going to acquire the explosives later.
Head back to the library. Exit H2 using the same backdoor you used to get inside. DO NOT head to none of the two front doors; not even use the corridors that lead to them. There are some enemies there and you don't need to kill them now (Note: you can actually head to the front doors but this leads to a different, and generally tougher, solution for the level and I'm going to talk about it later, in the topic "Alternate Solutions"). When exiting through the backdoor, DO NOT turn left. Turn right, in the direction of the first house. The alarm must be off.
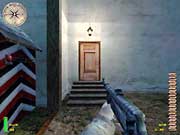
After getting out of the second house, head to the entrance door of the third one. But, that's a long trip. You must go around the houses, clockwise, walking always near the edges of Area "C". Proceed to H3, pass near the exit gate, keep going on and stop near the barbed-wire fence, facing the front door of house 3, that's far away from you (S3 on the map; see small pic on the left). Select the silenced pistol again, reload and quicksave (small pic. 8 beside). |
| |
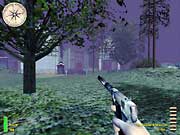
If you want a stopover to try to kill one or luckily more fixed enemies, you can try the following: remember when you had to kill enemies E27 to E29 and you headed to K27 spot? Half your way to H3, stop near the fence, quicksave, look in the direction of the houses and head to K27 crouched, KAR98 selected and reloaded, scope on, paying close attention to that area. If you see a fixed enemy, kill him but take extreme care because differently from when you were cleaning the outside area, all the enemies now are very aware of your presence and they'll start shooting at you as soon as you see them or even before, specially the spawned ones. The fixed ones will try to get to an alarm switch (small pic. 9 beside). That's your chance to kill him. But, very important, only kill a fixed enemy if no spawned one is disturbed, i.e., if after killing the fixed enemy, no spawned one sees you. It's not worthwhile to kill any spawned enemy in this area right now because sometimes, he get sort of stuck there and this means that you'll have one spawned enemy less to keep spawning while you invade the third house. I don't know why they stick to one place sometimes but when this happens it's good for you. |
Stopover said, let's invade H3. From S3, start walking towards the guard house. If the alarm goes on (most probably), start running and turn if off, crouch, stay inside the guard house for cover, and kill the two spawned enemies that'll show up. If the alarm goes on again, turn it off as soon as possible, preferably before killing the spawned enemies, or there'll be more to kill. Soon the alarm will keep quiet definitely. If it doesn't, then use let it ring technique (wait the five messages to toggle it off, while killing the spawned enemies - no fixed enemy will show up here) and then turn it off. It must stay off now. Select the KAR98, get out of the guard house slowly, looking through the scope to the front door. It should be open and there must have no enemy to kill. They are all hidden; they're smart.
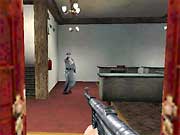
Stay up, select the MP40, reload and quicksave. Run to the frontdoor and, when inside, take the left and enter the kitchen quickly. As soon as you're in the kitchen, don't waste time trying to cook. Take the left or the right, it makes no difference, and crouch very near the wall of the door to wait for the enemies.
| Pic. 10 - Once again, to kill some fixed enemies, use the kitchen as cover and let it ring. |
The alarm is on. Now you're going to let it ring again (it's good for the mission statistics page!). Kill everyone that try to enter the kitchen, be happy when it's a fixed enemy, health and ammo at will from the dead spawned enemies (pic. 10). To grab health or ammo, just run to the other side of the door while passing on them and, from the other side, keep killing.
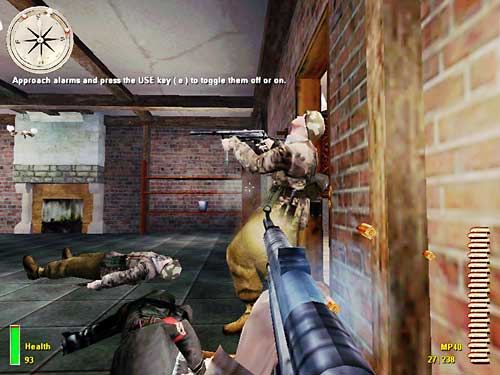
 When you've noticed that only spawned enemies show up, or if no one else shows up, they are waiting for you outside the kitchen. Keep going from one side to the other of the door to provoke the enemies and, taking cover behind the door, kill the enemies on the first floor, near the door at the right (small pic. 11 beside).
|
| |
 The pistol or the KAR98 is more effective to kill them but take care because the spawned enemies seem to know when you're using the slow KAR98 and attack you quickly, but it's possible to use it (small pic. 12 beside).
|
| |
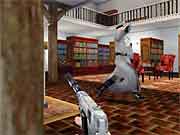
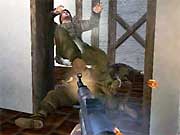
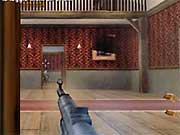 Kill also any fixed enemy far away, through the door of the floor level, ahead of you (small pic. 13 beside) and also, kill any possible enemy near or up the stairs, to the left side. Keep quicksaving when the situation is good for you (good health and good ammo) and quickloading if you're badly hit. You can also throw grenades to these two doors.
|
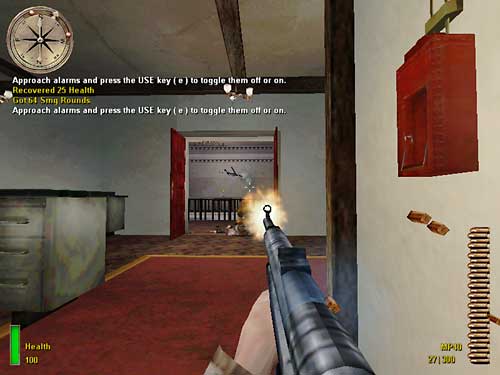
Once there is no more visible fixed enemy to kill and once at least five toggle-alarm-off messages have already been showed, right after killing the spawned enemies nearby, run to the stairs (to the left), climb it up, take the right and, always running, go ahead and take the left, at the end of this corridor. Kill any enemy on your way. When entering this next corridor, most probably there'll be one or two enemies left to kill. Kill them. Normally the enemies from the two rooms of this corridor will come after you, so you don't need to go get them. Then, quickly, take cover at the door (the entrance door to the corridor), to its right side, and crouched wait and kill the spawned enemies that'll show up (pic. 14). If you need health, there is a 50% health pack at the end of this corridor. Go there and grab it. Use the two doors, that should be open, as cover to head to the entrance door of the corridor again. If you were badly hit, you can always heal yourself by grabbing the random canteens left by the dead spawned enemies.
| Pic. 14 - Recover from the run & gun approach to get to the corridor at the first floor by letting the alarm ring, killing the spawned enemies, grabbing their health & ammo and always quicksaving. |
 Right after killing the spawned enemies nearby, crouched, head to the alarm switch, paying attention to the stairs because new spawned enemies coming can reach you from down there. Always quickly, turn the alarm off and kill any enemy trying to shoot at you from the floor level, from the stairs or from the door, at the first floor, ahead of you (small pic. 15 beside). The alarm should now be off.
|
| |
|
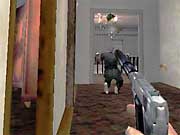
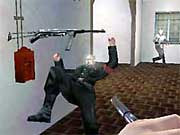
 You're almost done. Now, take the pistol and head to the door ahead of you. There are three or four enemies left to kill. They'll try to turn the alarm on and they should succeed. Kill them all (small pic. 16 beside). Enter the door at the back of this large dining room to kill the another fixed enemy. He may get out, though, if you take long to enter. Do not grab the manifest yet. Get out of this office and go back to the alarm switch near you to turn it off. You're going to face two last spawned enemies, if you managed to shut off the alarm before killing them; otherwise, four last spawned enemies. Go back to the office and "Steal the troop manifest" to complete one more objective (Troops manifested auto-save title). You're almost done. Now, take the pistol and head to the door ahead of you. There are three or four enemies left to kill. They'll try to turn the alarm on and they should succeed. Kill them all (small pic. 16 beside). Enter the door at the back of this large dining room to kill the another fixed enemy. He may get out, though, if you take long to enter. Do not grab the manifest yet. Get out of this office and go back to the alarm switch near you to turn it off. You're going to face two last spawned enemies, if you managed to shut off the alarm before killing them; otherwise, four last spawned enemies. Go back to the office and "Steal the troop manifest" to complete one more objective (Troops manifested auto-save title).
|
| |
|
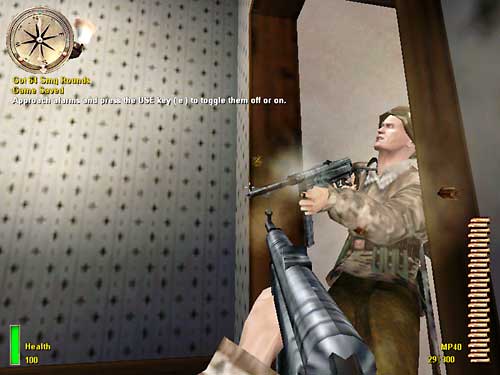
 Go down to the floor level, take the left, right after the stairs, and take a look at the first door to your right, in the corridor. There may have three last fixed enemies inside. If so, kill them (there is a bug here: sometimes, when the door is already open, you'll find these three fixed enemies alert but still, and even if you stay near the open door, they'll keep still, unaware of your presence and it's very easy to kill them all). Sometimes, though, before you have a chance to get near the door, they'll exit the room shooting at you (small pic. 17 beside), so take care. Go down to the floor level, take the left, right after the stairs, and take a look at the first door to your right, in the corridor. There may have three last fixed enemies inside. If so, kill them (there is a bug here: sometimes, when the door is already open, you'll find these three fixed enemies alert but still, and even if you stay near the open door, they'll keep still, unaware of your presence and it's very easy to kill them all). Sometimes, though, before you have a chance to get near the door, they'll exit the room shooting at you (small pic. 17 beside), so take care.
|
The third house should be clean now. Get out of it through its backdoor.
You must now kill the guys left alive at H2, in case you were not able to kill them before without having the alarm toggled on. It was supposed to be easy, since H3 is clean now, but it won't be. When you enter H2 again, now using its frontdoor, or even its sidedoor (it makes no difference) an exception will occur. At least three supposedly fixed enemies (the ones that wear dark clothes) will spawn, pop up, at the first floor, inside the room where the alarm switch is located and they'll toggle the alarm on instantly. So, more normal spawned enemies will be on your tail and you'll have at least five more enemies to kill.
Even if you did manage to kill the guys inside the two rooms of the first floor before, if you enter H2 again, through one of its front doors, the same exception will occur and the alarm will go on again. I recommend that you do so, that you enter again the house, to kill all of them, so you can have total freedom to walk inside the houses with no surprises.
 What you can do is to run inside H2, using the frontdoor, weapon reloaded (MP40 or pistol), head straight to the library, climb up the stairs and head to that room on the first floor, open the double door and kill the enemies inside (small pic. 18 beside). Head to the alarm switch, turn it off, wait for the two spawned enemies and, when they open the double door, kill them, one at a time. It's pure run & gun approach. You can try other solutions.
Now, head to the corridor where there are the two rooms with enemies alive inside and kill them all. One room at a time, first the first room. At the second room, acquire the explosives. Once again, if you cannot kill them without having the alarm set on, don't do it. Invade H1 first and then come back to finish them.
Note: I have also seen three new fixed enemies show up (spawn) in the room on the first floor of H3, where originally there were there guys playing cards, but this happened only once and I was not able to reproduce it again, so I don't know what triggered it.
 We're finally going to invade H1. This is the easiest house because it has only six enemies inside and now that you have cleaned the other houses (with the possible exception of the two rooms at H2), you can manage to invade it without having the alarm toggled on. If the guys at H2 are still alive, select the pistol and reload it. Otherwise, you can use the MP40 or the shotgun. Before, let's name the rooms of the first floor of this house to make it easier to explain. The 1st floor has one non-straight corridor with four doors. Coming from the stairs, the 1st door leads to the bathroom, the 2nd to a bedroom, the 3rd to an office and the last to the radio room. Let's call them doors 1, 2, 3 and 4, respectively.
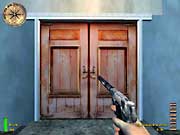
The first thing to do is to get near the entrance door. As for H2, it's not so easy. Use "walk-wait-n-quicksave" technique to approach its front and only entrance door (S1 on the map; see small pic 19 at the left).
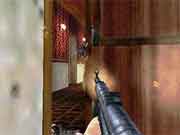
 Once in front of it, quicksave again. Now, start running, open the door, go ahead and turn right at the end of this first room (where there is a fireplace). There is an alarm switch in the next corridor. Kill any enemy nearby, before they can turn it on (small pic. 20 beside). Keep running, turn left, take the stairs to go up and at the end of it turn right to enter the corridor of the first floor. Kill any enemy on your way. On the first floor, take the corridor, then turn right and look at another alarm switch. Kill any enemy near it or on your way! The alarm should be still off. You must have killed four enemies. If you killed less, take a look at room 2, where most likely a german should be near the bed. Or, rarely, you may find an enemy at room 3.
Don't go any further then what's needed to kill the four enemies. Don't use the radio yet, it's at the end of the corridor and you can use it later. Go down the stairs, go back to the first room (where there is the fireplace) and pass through a door at the right. Stop! There is another door that leads to the basement. If everything went right, this door should be closed yet. If it's open, it means an enemy may be heading to the alarm switch outside (if it's not already on). If the door is closed, quicksave. If it's open or the alarm went on, try again, from the beginning (see Things went wrong, below).
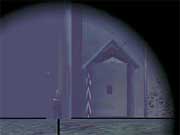
 Now, you're going to invade the basement. There are only two guys down there. Using the pistol yet, open the door, run down the stairs and kill both enemies. They should be very near the end of the stairs (small pic. 21 beside). Don't go any further then what's needed to kill them! Now, you're going to invade the basement. There are only two guys down there. Using the pistol yet, open the door, run down the stairs and kill both enemies. They should be very near the end of the stairs (small pic. 21 beside). Don't go any further then what's needed to kill them! |
| |
|
 Head back as soon as they're dead, run to the alarm switch (of the floor level, of course) and stop. If the alarm is on (may happen sometimes), turn it off or use let it ring technique to turn it off, in case you cannot do it otherwise. From near this alarm, you can kill spawned enemies that'll show up, in case you need (small pic. 22 beside). Head back as soon as they're dead, run to the alarm switch (of the floor level, of course) and stop. If the alarm is on (may happen sometimes), turn it off or use let it ring technique to turn it off, in case you cannot do it otherwise. From near this alarm, you can kill spawned enemies that'll show up, in case you need (small pic. 22 beside).
|
H1 is clean. Now, complete two objectives. At the radio room, "Send the false communiqué." (Radio free Manor house auto-save title). At the basement, acquire the King Tiger field manual to "Gather any intelligence on the new Tiger tank" (Plans stolen auto-save title).
Things went wrong (somewhat rare) - If you find it difficult to invade the first house without having the alarm turned on, then, after you have killed the four enemies, stay at the corner very near the alarm switch of the first floor and turn it off. Kill the two spawned enemies that'll show up using the silenced pistol. If the alarm goes on again, keep turning it off and killing the two additional spawned enemies each time. Chances are that after one or two times, the alarm won't go on again. If it doesn't, use let it ring technique (pic. 23).
Note - I've read some messages at EA forum from players that can't find the King Tiger field manual on the table, at the basement. If this happen to you, I'm sorry, but I have no idea about what to do, since this never happened to me. The only explanation I can think of is the obvious: it must be a bug.
| Pic. 23 - If you can't invade without having the alarm on, " let it ring" may be needed at 1st floor. |
After H1 is clean, if H2 has yet the enemies alive at those two rooms, go back there again and now you can finally kill them without having the alarm toggled on. Don't forget to acquire the explosives.
Since there are three entrance doors to H2 and two entrance doors to H3, you can try other solutions for invading these houses. You can even try different sequences of invasion, starting by H3 or H1 (as already mentioned). The possible combinations are many. About H2, I don't recommend trying to start the invasion using its front doors because this area is very sensitive and dangerous. You'll be in an open area, full of enemies coming from H2 and H3, and, worst, this is the preferable spot for the spawned enemies to pop-up. You'll be very near them, what is not good at all. But you can try!
You can also try to start the invasion of H3 using its backdoor. After invading H2, exit it using its frontdoor. Most probably there'll be one or two enemies to kill before getting out of H2, very near the door, or they may be outside. When getting outside, an enemy from H3 may head to the guard house, to turn the alarm on. Even if this enemy doesn't show up, the alarm will go on almost invariably. My advice is to enter H3 quickly, take right and take right again, in the first door, to enter the bathroom. Inside the bathroom, using its door as a cover, you can use let it ring technique and kill the fixed enemies inside the room ahead, for instance, and the ones that try to enter it. When done, run to the kitchen and resume the walkthrough as told.
So, try out other solutions. In this walkthrough, I've tried to show you the one I found to be the easiest one, but you can have different opinions, after trying them by yourself.
 After all the houses are really clean, it's time to earn your fourth medal. You've done the worst part: to acquire the explosives. Now, just head to the Tiger Tanks, in the outside area, and explode them. You can find that red flashing spot on the back of each one, now that you have the explosives. Don't forget to run away from them because the explosion can hurt you. Also, after each explosion, expect three new enemies to pop up. Three new enemies spawn in H1, after you set the explosives in the first Tiger tank, and another three pop up near the entrance door of H3, for the other Tiger tank. So, you'd better explode one tank, kill the three enemies, explode the other tank and kill the last three enemies. The KAR98 is the weapon of choice. These enemies do not turn the alarm on.
And, for dedicated service in the armed forces, for displaying conspicuous initiative, for, singlehandedly destroying two King Tiger tanks while on a special intelligence gathering mission, you are awarded The Good Conduct Medal.
Now, please, click here to go to the third and last part of this walkthrough, the tough exfiltration.
There are no cheated screenshots illustrating this text; only real screenshots or cut from real ones.
http://www.viol.net/mohaa
Version 1.00 posted on March 20th, 2002
(V.1.01 - Mar 23rd, 2002)
All rights reserved. © 2002 by André Viol.