Storming Fort Schmerzen - The Conclusion - MoHAA
Introduction
You're now at the last level of the last mission of the game: the Conclusion; you have to get the hell out of the mustard gas plant and head to a boxcar outside where the Rangers are waiting for you to go finally home. This walkthrough was done for the HARD difficulty mode; I didn't test it for the easy and medium modes. This level is, in my opinion, the hardest one, although it is the shortest, as well (it had to be for so hard it is!).
If you have read my other walkthroughs (like Final Run and Omaha Beach, for instance), you have noticed that I am a prolix guy. It's just my way, I can't explain things without using too many words.
And, the usual warning: if you don't want to spoil the fun, don't read further. Nevertheless, at the end of this walkthrough, I'll make some considerations about this level and, as you'll see, one of them is that I found it not so adequate, so to speak.
First, you need to be well prepared to start the level. What I mean is: you must start this level with 100% health and with all your important weapons (the Thompson, the StG 44 and the Shotgun) fully loaded. So, before using the wheel, in the Final Run (or while running to the wheel), be sure to select these weapons and make a reload for each one of them, so, when you start the Conclusion level, whatever the weapon you choose to use, it will be fully loaded. If you need to switch to another weapon in the middle of the battle, it will be ready for use, fully loaded. To switch between weapons is faster than reloading the same weapon. You can also reload these guns at the end of the step 13, in the Final Run walkthrough, where you can have all the time you need and, so, you will have just one weapon left to reload, when running to the wheel. Since I wanted to start the Conclusion with the Shotgun, I finished the Final Run with this weapon selected (although I never used it in the Final Run itself) and, obviously, with a full clip (full load - 5 shots available).
Secondly, an advice: turn off the sound! Yes, you've heard it well: turn that highly-rated sound OFF. This may seems heretic for a hardcore gamer but the fact is that you pay a price for the realism and this price is less concentration; since you are going to make precise movements with your hands, all your attention should be focused on your movements and not on paying attention to the sounds. Also, the sound can be tiresome, since you will have to repeat the same scene many times. If you don't want to turn it off, just lowering the volume may help. This is just a tip, not part of the walkthrough, of course.
And before going into the steps of the walkthrough, I want to point out that this is by no means a definitive walkthrough for that level. The Conclusion is a very tough level and I am going to show one way to try to beat it; I'm confident that many players will find other ways to do the level. But, I did my best to find a way that can be reproducible, sort of safe, and, after playing many times this walkthrough, I dare to say that if it is not it, it is close to it. The artificial intelligence of the enemies is highly sensitive and a slight difference in your movements can trigger a different behaviour of the enemies. So, the reactions described here for the enemies may, sometimes, differ from what you'll read but, all in all, you can, mostly, expect them to react as described. Due to this characteristic, each step will require mastership of it, you will probably have to repeat it many times until you get accustomed to it.
So, enough talking. Let's go to the steps.
| 1. |
The first part of this walkthrough is done using the Shotgun, as I told. As soon as the level starts (actually, before I click the mouse to start the level, my Forward key is already pressed), take the left, pass near a fallen desk and kill the guy at the corner (pic. 1) with one shot. |
| | |
| 2. |
Use always head shot or you will have to shoot twice and you have no time to waste shooting twice the same enemy (pic. 2). |
| | |
| 3. |
Immediately, click quickly the backwards key to go back just a little, turn yourself to the left, aim the guy that is in the next room, behind some bars and shoot him once (pic. 3). Depending on your position, you won't have to go backwards at all: just turn left to reach the guy behind the bars. Note that this second enemy is tough to kill because the window is small, he's not always centered in that window and those bars seem to protect him, although these same bars do not protect you from his shots at all! |
| | |
| 4. |
Immediately after your second shot (and necessarily your second kill), head to the corner on the way to the exit, in a position where you cannot see the exit door (pic. 4), to take cover. As soon as you get to this corner, CROUCH. |
| | |
| 5. |
Almost immediately after you crouch in this corner, a third enemy will show up (he should take no more than one second to show up), coming from that small corridor that leads to the outside. Since you're crouched, stay alert and with your shotgun aiming high, and, as soon as you see him coming, kill him with one head shot (pic. 5). Immediately after the shot, QUICKSAVE ! The first part is over. Note that sometimes this third enemy will stand still, in the corridor, and he will not come after you; if this happens, you'll have to start it over. |
This first part should take around six seconds. Take a look at your quicksave data, in the Save/Load dialog, to know how long it took so far: it should be 5 to 7 s, most likely 6 seconds. If you spent seven seconds, it may be tougher to finish the second part of the walkthrough.
Now, some observations. There is a way to kill the first enemy and head to the corner, to kill the third one, without the need to kill the second one. After you've killed the first enemy, you just have to go backwards enough to get out of the sight of the 2nd enemy, then wait just a fraction of time and head to the corner to wait for the third enemy. The enemy behind the bars will be killed by the explosions occurring in his room. But, this behaviour is not trustable, it happens sort of randomly, so I'd rather kill him to be sure he'll not fire at my back. An another observation is that this enemy behind the bars, if you don't kill him soon enough, he may sometimes get out of the room passing through the wall, like a ghost! Yes, it is a bug, an ugly bug. Try to let him alive, head to the corner and turn around to look behind (pic. 6): you'll see him right behind you; sometimes you can even see him passing through the wall just in front of you: a real ghost.
Note that if anything goes not as expected while you are trying to do this first part of the level, don't go on, just stand still and wait for you to die (what is not going to take longer), breath deeply and start the level again. You must finish this first part with 100% health and the three enemies dead, taking around six seconds to quicksave this situation.
|
The Second And Worst Part |
|
You have killed three. You will have to kill four now. First, you need to learn the big real trick about this level. The "safe zone". Well, it will be safe after you kill the next four enemies you are about to. I will call the safe zone the area, in the corridor that leads to the exit, where you cannot be shot by any of the snipers outside and cannot be harmed by the explosions inside. In the safe zone you have to be worried only with the next four enemies.
So, where is this safe zone? Look at the next picture (pic. 7). The safe zone, is the RIGHTmost side of that corridor, starting at the center of the column that makes the corner you have crouched to take cover, and finishing at about two thirds of the extension of the corridor. |
| | |
| 6. |
Now that you know about the safe zone, we can go on. As soon as you quickload your saved game, you will need to switch weapons. Your Shotgun has only two shells left and this is not enough ammo to kill four tough guys. I use the StG 44 as my next weapon of choice. So, press F9 (quickload) and immediately after press "4". Then head quickly but alert to the right, to enter the corridor. Keep yourself always crouched and always hugged to the right wall of the corridor. Although the safe zone allows you to go to the middle of the corridor, while the enemies are firing at you, you'd better hug that wall (pic. 8). Do not go any further than what is needed to shoot the enemies because you may have to step back to switch weapons again. |
Accordingly to my observations, the StG 44 can keep fire for only three seconds. It is possible to kill all the four enemies with just one clip (30 bullets) but this is not an easy task. It will depend on luck, good aiming and very quick keyboard movements. You will find that these four enemies may be in several different positions, since very near the corner where you are standing (they are coming to get you) from almost all of them outside; a nasty one probably will take cover behind the fallen desk outside (making very hard to kill him), other may be far from you outside, or you can have all of them coming to get you, making a line (the easiest situation for you because you just have to keep firing to one direction), among others possible layouts of enemy attack.
What I do is to fire for three seconds, trying to kill them all, and immediately head backwards, to the same corner I was before, to take cover while I switch my weapon again, now to the Thompson. As soon as the Thompson is ready (or a fraction of second before) I get out of this corner, because it will explode, and I resume fire, killing any enemy still alive (chances are that there will be enemies yet to kill). You have around eleven seconds to get out of this corner definitely; since you already spent around six, in the first part of the walkthrough, there are only five seconds left, so you have to be very quick in your movements.
I would say that this is the worst part of this level. You have to try, try and try, until you manage to beat those four bastards. Once you do it, just stand still, breath deeply (again), because the rest of the level will be sort of a piece of cake, compared to what you have done so far.
Just for your information, I have managed to finish this second part of the walkthrough with health from 1% to 60%. Normally, I finish it with my health around 25-30% (when I finish it because most of times I die). Actually, it doesn't make much of a difference because one shot of the snipers outside will kill you anyway, if your health is less than around 50%. But don't worry, even if you finish it with 1% health, you have a big probability that you will finish the rest of the level, you'll see.
Note: once you get used to the first and second part of this walkthrough, you should be able to try to do both parts at once, without quicksaving and stopping the action, after you kill the third enemy.
| 7. |
After making your way to the safe zone, killed seven enemies, you have three more dangerous ones outside. One is in a watch tower at the left side of the exit, the other two, at the right side, being one in a rather closed room and the other in an open area, just ahead, both high above floor level (pic. 10). |
| | |
| 8. |
The first one you should kill is the one at your left. He is rather easy to kill. Fisrt, save the game so to not jeopardise what you've accomplished so far. Select the Springfield sniper rifle, go ahead a little, in the safe zone (take care and don't get out of its limits), look at your left, for a watch tower, with the scope. Once you've found him, shoot him. That's all. You may be shot once or twice until you get used to looking through that open gate and the fence; just reload your saved game and try again. The picture 11 shows the sniper still alive and, at the upper right corner of the same picture, in a detail window, he's not there anymore (nice shot!). |
| | |
| 9. |
Now, the other two snipers. Strafe a little to the middle of the corridor, look at your right (pic. 12), through the open gate and the fence again. You must be very careful because you don't know where they are, the gate and the fence are a good camouflage for them. You will probably be shot some times before you get a clue about where they are, so save the game. |
| | |
| 10. |
First you must kill the sniper at the open area. Carefully, strafe left, then go back, do it again, until you hear a shot (you should turn the sound on, now, if you had it off). If he miss the shot, you can try to see the sparks of the shot: the sparks will reveal his position. If he doesn't miss it, try again. Using this technique (watching the sparks), you can find him and, once he is in your scope, just shoot him (pic. 13). But beware that you may be fooled by the camouflage (gate plus fence) and think you killed him but you didn't. So, watch out and don't ever forget to save. |
| | |
| 11. |
After you take down the 2nd sniper, it's time for the 3rd one, the one in the closed room. Go a little ahead, in the safe zone, and just use the same technique: save, strafe, go back, pay attention to the sparks, expect to die some times, find him and shoot him (pic. 14). |
Optionally, if you want some action, you can try to use a machine gun to kill the snipers. Just unload a full clip in the direction that you believe he is located; do this until you kill him. You will probably be killed first but, at least, you had some fun! And I assure you: you can kill them all using a machine gun.
Well, that's all. End of history.
No. Not so fast!
Have you noticed that since you managed to get to the safe zone the explosions stopped completely?
Have you noticed that the door of the boxcar is shut? No Rangers, no way home, no The End?
The fact is that you must get out of the installation for the door of the boxcar to open and you can be able to finish the game. This seems obvious but the other fact is that the door will not open as soon as you get out. It will take some time, time enough for three other enemies be able to kill you. They are located in an open area at your left, separated by a fence, where you cannot enter: it is the same place where you entered this building, in the first level of this mission (pic. 15).
You have two options. The easy and the tough solution. The easy one is to head to a place where you can hide, until the door opens, and then head to the boxcar. Since your health will be 100%, you can stand some shots without dying. The other is to kill all the left enemies. It's your call. Be advised that the easy one works fine. You actually don't have to kill them. |
| | |
| 12. |
So, first, let's refuel our health. You must be almost dead by now so let's make it 100%. Quicksave, stay up, run in the direction of the fallen desk, in front of you (pic. 16), jump it and go backwards until you hug the desk. Your health should now be 100%. But don't stay there even a second because the enemies, at the open area, are about to shoot you, or already shooting at you. |
| | |
| 13. |
You can take your left, and hide behind and very near the closest wooden column that support the watch tower (pic. 17). |
| | |
| |
Or, you can take your right, and hide in a safe corner near the fence (pic. 18). |
| | |
Some time after you hide, the explosions will resume and you will hear the Rangers calling for you. As soon as the explosions begin, just head to the boxcar and meet the Rangers. I think I should say, those useless Rangers (pic. 19). The End. |
If you want more action and more challenge, here's a good one. Kill the three last enemies!
|
They are not easy to kill because, again, there is a fence that make finding them a tough task and, worst, the explosions make the screen move in all directions turning it into an exercise of patience and skill. But, of course, it is possible and it's a unique situation. So, bear in mind that the game is almost over, it's your last chance to kill some enemies that you've never killed before (pic. 20). And this is no excuse for you not to finish the game with 100% health, hard difficult mode! |
| |
|
To kill them, I used the Springfield again and the machine gun, depending on each situation (the machine gun I used to kill the guy inside the covered place since I could not see him in any way). While trying to kill them, I was positioned behind one of the watch tower's columns, the one that suited best to each enemy (as in pic. 17, above). |
|
My Conclusion About The Conclusion |
|
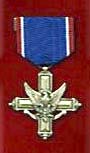 After all this long (it could be longer...) and difficult journey, Lt. Mike Powell, don't forget to look at your medal case, right in the center of it. You are now the most recent owner of the Distinguished Service Cross. Be proud of it, after all, for extraordinary heroism in connection with military operations against an opposing armed force, you successfully completed a tremendously difficult tour of duty in the European Theater of Operations.
Well, summing it up, Medal of Honor: Allied Assault is a hell of a game, but this Conclusion level is totally unfair, unnecessarilly difficult (I'm talking about the first and second part, as described in this walkthrough). I didn't have the fun I expected trying to beat this last level. Even after I managed to get through it, I didn't feel great, like in other situations in the game where, although it was difficult, after you beat it, you felt good. So, the game is absolutely great, its last level is hard and tiresome work. I didn't mind the ending, only a "The End", no final message, no fuss; that's okay, it could be better, though. But I disliked this final level. Stupidly hard. I'd say that this last level is a cheating, in itself, against the player (I mean, unfair to the player). But it does not blemish the game. And, after all, it is possible even in hard setting.
Note from July 14, 2002: Some readers sent me messages disagreeing with my conclusion. I'd like to explain that when I wrote this "Conclusion About the Conclusion", the comments above, back in February, I had just managed to finish the game, after many attempts, and so, by then, my feelings about it were angriness mixed with passion with the game. Now, some months have passed and I must say that the angriness is gone and I agree with these readers. When I wrote that comment, it was right after I had learned the way to beat that last level and that last level is quite hard. It made me really mad while trying. But, after one calms down, after one finally beats the level, after some thinking, we realize that it was a good experience and, yes, the last minute of such a game must really be hard in a way that one won't forget it. So, I have changed my mind about that last part but I decided not to modify my original comment because it was what I was feeling about the game at that moment, when everything was still hot and fresh. Here is my reply to one of those readers: "Yes, that last level is more than tough. But, after trying it around 'one thousand times', after you finally manage to beat it, after the game ends, after you have re-played the game many times (some parts of the game, at least), after you start to miss the game because there is no more game to play, you sort of start feeling that that hard ending was not so bad and you may even forgive the programmers for doing such a hard level".
Anyway, let me quote a message I received about this last level because it describes very well the way I felt when I was trying to beat it: "I recently "finished" playing in hard mode. This level drove me round the twist! And certainly bored my children too. I certainly tried for an hour or so, on more than one occasion, but found it so frustrating I got very angry, stressed and gave up! Pulled the console down, into God mode and walked out to see the ending. In my opinion this level was too much without any chance of respite until you've killed all seven guys, plus getting continually toasted by the fire. A game should be fun, not introducing stress. Still, now I've got your walkthrough and knowing it's not impossible, I'm going to go back and give them a kicking :-)" (sent by Bob Wilson, from England)
Obs.: Only pics 10, 15 and 20 are cheated screenshots; all others are real screenshots.
http://www.viol.net/mohaa
Version 1.00 posted on February 16th 2002
(v.1.03 - feb/2002)
All rights reserved. © 2002 by André Viol.